Just three days ago I experienced food poisoning. I had been warned that the meat may be a little too old to eat, but when I smelt it, it seemed fine and I was hungry so I went ahead with my decision. This is one of my biggest regrets of 2016. Food poisoning is one of the only experiences where, whether you believe in a God or not, you will cry out to him and feel he has turned his face away from you.
We all love a good “buy one get one free” deal at our favorite grocery store, but if we are not familiar with creative ways to preserve our food, we will find ourselves wasting both money and food when we are unable to get through the ready-to-eat-food (the starving children in Africa eek!).
Preserving food can be done in a multitude of ways, such as sugaring, salting, burial, jellying, jugging and smoking. So to save you an outcry to a Supreme Being, here are five natural ways to preserve food with a few easy recipes to try for yourself.
1. Drying
This is one of the oldest methods of preserving food, and by old, I mean 12,000 BC. It is also the cheapest and most environmentally-friendly method that you can try this summer.
For centuries, people have been using solar power to preserve their fruit, vegetables and meat. Sun-drying is great because it ensures that all those natural flavours are preserved. All you need is a climate with high temperature and low humidity for this to be a delightful success. Why not try this:
Sun-dried Tomatoes
Roma or Pomodoro are the best type of tomato to sun-dry but any variety works. Slice the tomatoes at a consistent thickness to ensure that they dry at an even rate. Arrange them on a frame that has stainless steel screens at the top and bottom. Season your tomatoes with herbs and salt and leave to dry in direct sunlight with as much breeze as possible for several days. You will know that your tomatoes are ready when they are no longer “stodgy” to the touch. Once ready, you can store them in glass jars with olive oil, or in vacuum-sealed plastic bags.
Fruit
Because of the high sugar and acid content in fruit, they are less likely to spoil whilst drying. Apricots and peaches need to be cut in half and pitted. For fruits that are prone to brown, such as apples, pears and apricots, you should soak them in lemon juice for about five minutes first. Like the tomatoes, dry your fruit over a particularly hot and dry spell of 85 degrees Fahrenheit or more. To prevent moisture from coming into contact with your fruit, bring them inside during the evening and cover them with a cloth.
Once your fruits have dried sufficiently, you will need to condition and pasteurise them. To condition, place your dried fruit in glass jars for seven to ten days, shaking the jars daily to distribute any remaining moisture. To pasteurise, you can follow one of two methods; you can either place your fruit in the oven at 160 degrees Fahrenheit for thirty minutes, or you can place them in the freezer at 0 degrees for 48 hours.
The same process is followed for any vegetables you would like to try and dry.
2. Pickling
Salt and vinegar are great pickling agents that both preserve food and kill bacteria. Salt in particular is an ingredient not adequately praised for its many functions. Preserving food with salt is a common way that many people used to stay alive during droughts, severe winters and whilst traveling. Salt draws moisture out of your food item, ensuring that it does not rot. Nearly any vegetable that you can fit into a jar can be pickled. Below are two recipes to try and they only take 10 – 20 minutes to prepare!
Pickles 1 pound cucumbers sliced 3 teaspoons salt ½ cup cider vinegar 1 teaspoon pickling spice / mustard seeds 4 cloves garlic sliced
Place the cucumbers in the jar. Bring the remaining ingredients to the boil in a saucepan. Once cooled, pour over the cucumber slices. Add water if necessary to fill the jar, leaving room at the top to stir. Refrigerate.
Red Cabbage 3 cups sliced red cabbage ¼ cup cider vinegar 2 tablespoons salt 1 teaspoon coriander seeds 1 garlic clove sliced
Place the red cabbage in the jar. Bring the remaining ingredients to the boil in a saucepan. Once cooled, pour over the cabbage slices. Refrigerate.
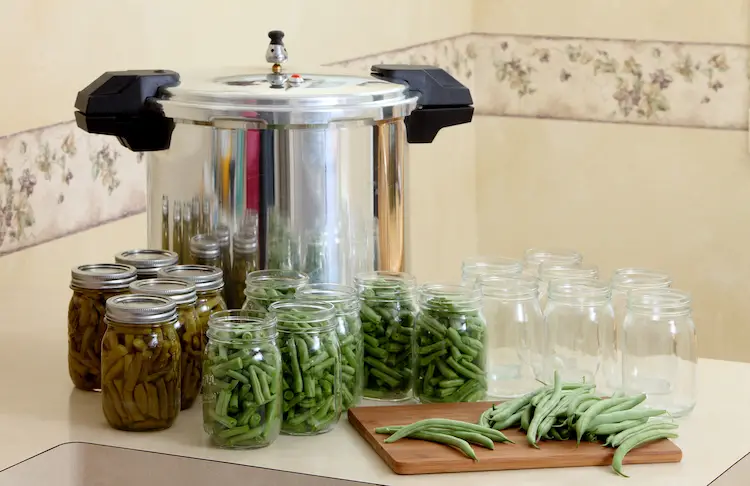
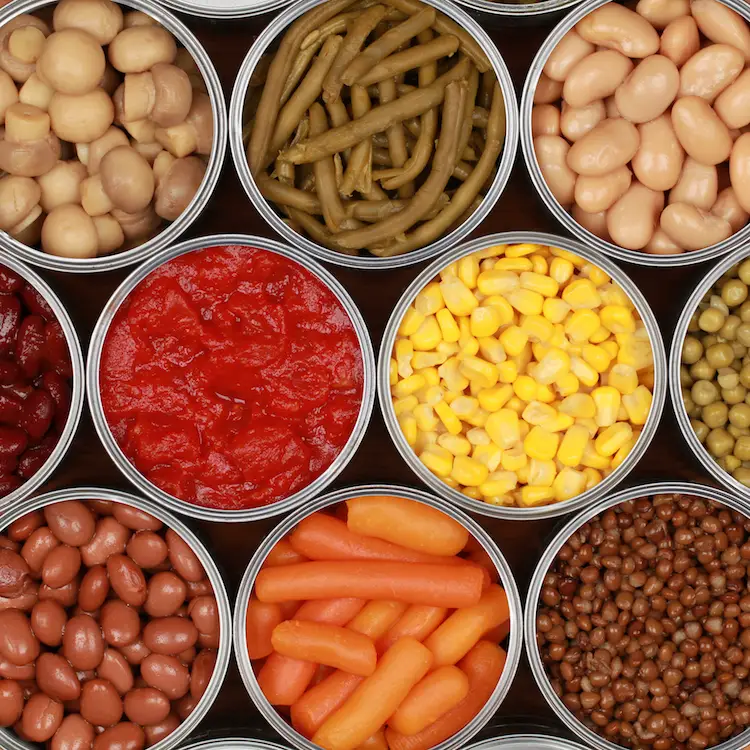
3. Canning
This method was invented by a French confectioner in the early nineteenth century. Canning involves cooking food, sealing it in sterile cans or jars, and then boiling these containers to kill any remaining bacteria. Through the process of heating, air is removed from the container and when it cools, a vacuum seal is formed that prevents any air from re-entering the container.
There are two methods of canning:
Boiling water bath.
This method entails cooked food within a container covered with boiling water and cooked for some time. This method works best with foods such as jams, fruits, pickles and tomatoes.
Pressure canning.
This method entails placing food in containers inside a pressure cooker filled with water. This works best with meat, vegetables and seafood.
Try these 2 recipes from Food.com to get you started:
Zesty Canned Salsa
Makes 6 Pints
Ingredients
10 cups roughly chopped tomatoes
5 cups chopped and seeded bell peppers
5 cups chopped onions
2 1⁄2cups hot peppers, chopped, seeded
1 1⁄4cups cider vinegar
3 garlic cloves, minced
2 tablespoons cilantro, minced
3 teaspoons salt
1(6 ounce) can tomato paste
Directions
Combine all ingredients except tomato paste in large sauce pot.
Simmer until desired thickness.
Stir in tomato paste.
Ladle hot salsa into hot jars leaving 1/4 inch head-space.
Process 15 minutes in a hot water bath.
Note: use more hot peppers for a very hot salsa or less for mild. It depends on how hot your peppers are and how hot you like your salsa.
1(8 ounce) can mushrooms, sliced, chopped, and drained
3 teaspoons minced garlic
16 cups tomatoes, peeled, cored, and chopped
3(12 ounce) cans tomato paste
3 tablespoons brown sugar
1 tablespoon dried oregano
4 teaspoons salt (canning)
2 teaspoons dried basil
1 teaspoon black pepper
1 teaspoon crushed red pepper flakes
2 tablespoons italian seasoning
1⁄2teaspoon cumin
Directions
Add all ingredients to stock pot.
Heat to boiling.
Reduce heat.
Simmer, partially covered for 2 hours.
Stir occasionally.
After it has simmered, fill clean sterilized jars to within 1/2 inch of top of jar. Put on cap, screw the band finger tight.
Process for 35 minutes for quart jars in a water bath.
** You can also freeze in quart size freezer bags.
This sauce is great on any pasta dish.
Canning is renowned for being an easy and effective method of food preservation using containers, but you might also be interested to learn about another controversial storage container – Teflon.
4. Freezing
This is the easiest method of them all. Freezing keeps food fresh for longer. What is great about this is that almost anything freezes well; from bread to meat to fruit and even milk.
When freezing meat, cut your meat into meal sized portions and place in freezer bags for convenient access when you need to defrost something. If you want to freeze green vegetables, it is important to blanch them beforehand.
5. Dehydrating
This simply means that water is removed from the food but the nutrients are preserved. To dehydrate meat, slice it into thin strips. Place it in the oven on a tray with low heat to remove the excess water. When you are ready to eat your dehydrated produce, be sure to restore the water to it beforehand.
You can also purchase a dehydrator which slowly heats food specifically to remove the water – it can result in unusual and delicious snacks and meals.
The following is a method to dehydrate tomatoes using a dehydrator – but this could just as easily be done in the oven on a very low heat.
Dehydrated Tomatoes
Ingredients
70 paste tomatoes
Mixed spice (optional)
Directions
Slice your paste tomatoes 1/4 inch thick.
Slice as many tomatoes as you need to fill the dehydrator.
You will probably have to do this in more then one batch depending on the size of your dehydrator.
Set the dehydrator to 110’F and dry for 15 hours.
When done let them sit on a cookie sheet for a few hours.
Use in all sorts of recipes of your choice.
Put in a glass jar and store in a dark dry place.
6. Smoking
Smoking can have an added benefit of giving the food a delicious flavor. This is not the easiest of the methods listed here, and care must be taken to prevent contamination and potential food borne illness.
It can done hot – in a kiln or smokehouse, or even or cold – using a low heat for up to 24 hours.
Smoking works as a preservation method in three ways.
The heat kills microbes in the food.
The chemicals found in the smoke act as preservatives.
The food dries out so there is less moist area for bacteria to grow.
If you want to try smoking give this delicious recipe from The Food Network a try.
Smoked Turkey with BBQ Gravy
Ingredients
Rub:
2 tablespoons salt
1 1/2 tablespoons ground sage
1 1/2 tablespoons thyme
1/2 tablespoon black pepper
1/2 tablespoon Neelys Seasoning, recipe follows
Turkey Brine:
1 gallon water
2 cups salt
3 cups apple juice
1 cup bourbon
1 tablespoon black peppercorns
1/2 cup light brown sugar
1 (22-pound) turkey
Olive oil
4 cups hickory wood chips, soaked in water for 60 minutes
BBQ Gravy, recipe follows
For the rub:
Neelys Seasoning:
3/4 cup white sugar
1 1/2 cups paprika
3 3/4 tablespoons onion powder
BBQ Gravy:
1 tablespoon vegetable oil
Drumstick, from turkey
Neck, from turkey
1 large onion, sliced
8 cups turkey stock or chicken stock
1/4 cup BBQ Sauce (recommended: Neelys BBQ Sauce)
Salt and freshly ground black pepper
Directions
For the rub: Mix all ingredients in a small bowl and reserve.
For the brine: Mix the water, salt, apple juice, bourbon, peppercorn, and sugar into a 5-gallon bucket lined with a resealable bag. Stir until the salt and sugar is dissolved. Add the turkey into the bag with the brine. In a garbage bag-lined ice chest filled with ice, place the bucket in and surround with ice. Keep in a cool place and let brine 6 hours or overnight. Turn the turkey after 3 hours. Remove turkey from the brine and pat dry with paper towels.
Rub the turkey with olive oil and massage the rub onto the Turkey.
Soak wood chips for 1 hour prior to cooking the turkey and drain well. Fill the chimney starter with charcoal and light. Burn until they ash over. Place the burned coals to 1 side of the grill. Place wood chips on top of coals. Line a standard size loaf pan with aluminum foil and fill 2/3 with water. Place in the grill opposite the coals.
Take the turkey and place on the grill over the pan of water. Insert a probe thermometer in the thigh to keep a check on the temperature as it cooks. Place the lid on the grill with the vent open.
The temperature should remain constant at 225 degrees F. You may need to add more coals and chips every few hours.
After 1 hour check the turkey, if the skin is golden brown cover with foil. Continue cooking for 4 to 6 more hours or until a probe thermometer reaches 160 degrees F.
Remove from the oven and let rest 20 minutes before you carve. Serve with BBQ Gravy.
Neelys Seasoning: Mix ingredients together and store in an air tight container for up to 6 months.
BBQ Gravy: Heat the vegetable oil in a saucepan on medium-high heat. Add the drumstick and neck and sear until brown. Remove from pan and reserve.
Lower heat and saute the onions. Add the stock, scrapping up the fond on the bottom of the pan. Add the drumstick and neck into the saucepan. Cover and let simmer until it comes to a boil; about 1 hour. Sauce will reduce down greatly. Remove turkey parts. Add BBQ sauce to pan and whisk together. Gravy will thicken. Season with salt and pepper.
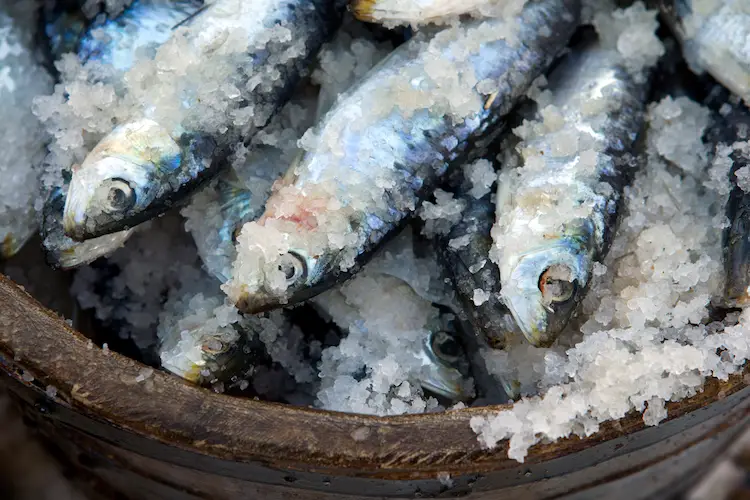
7. Salting
Salting is a long standing method used to preserve food, and while the process is very simple, the science deserves a closer look.
Salt draws water out of cells via the process of osmosis.
Essentially, water moves across a cell membrane to try to equalize the salinity or concentration of salt on both sides of the membrane. If you add enough salt, too much water will be removed from a cell for it to stay alive or reproduce. Organisms that decay food and cause disease are killed by a high concentration of salt. A concentration of 20% salt will kill bacteria. Lower concentrations inhibit microbial growth, until you get down to the salinity of the cells, which may have the opposite and undesirable effect of providing ideal growing conditions!
These methods are the easiest and most natural ways to preserve your food, without adding a ton of chemicals. We highly recommend giving this a try, especially if you find yourself with a glut of a harvest. Canning, pickling and drying are also a great way to enjoy fruits and vegetables out of season.
What are your thoughts?
Do you already try some of these at home? We would love to hear from you.